


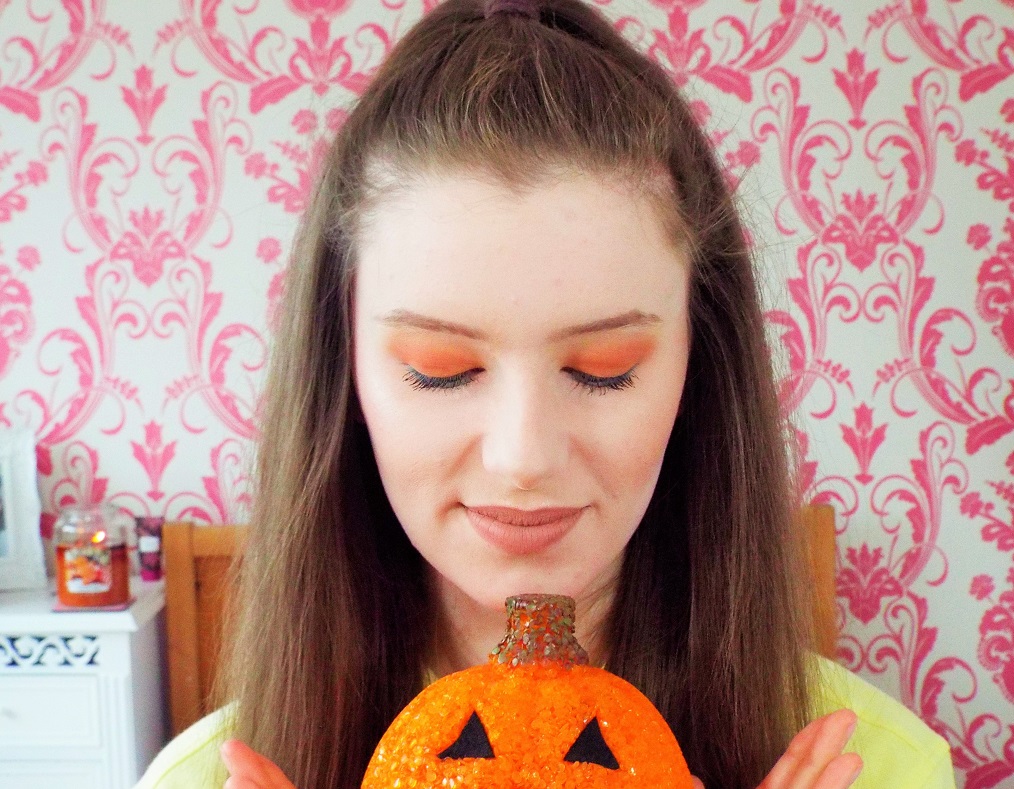
"What's this? What's this? There's colour everywhere! What's this? There's white things in the air!". Yes, I'm fully aware that it may not be the festive season just yet but there is no denying we all love to dabble in the excitement of the Halloween-esque Nightmare Before Christmas as soon as there's a chill in the air! Hence why today my little pumpkin pals I am bringing in the first spice of Halloween with this October inspired pumpkin pie makeup look. Subtle enough that it can be worn during the October days yet with a sprinkling of pumpkin-esque colours perfect for the run up to Halloween! If you too would like to share my excitement in the run up to one of the many exiting celebrations of the colder seasons then do read on where I will give a run down of the steps and products I used to achieve this pumpkin pie makeup look.
Eyebrows
- Beginning with the brows, I brushed them out and filled them in with the shade Chrome from the Makeup Revolution Flawless Mattes Palette on an angled brush, dampened with some MAC Fix +.
- I then carved them out with my Zoeva 322 Brow Line brush and the Rimmel Lasting Finish Concealer in the shade Porcelain.
- The beasts are complete!
Eyes
- If you prefer an easy going eye look that is very simple to do then I think you will like this one! All mostly matte shades too!
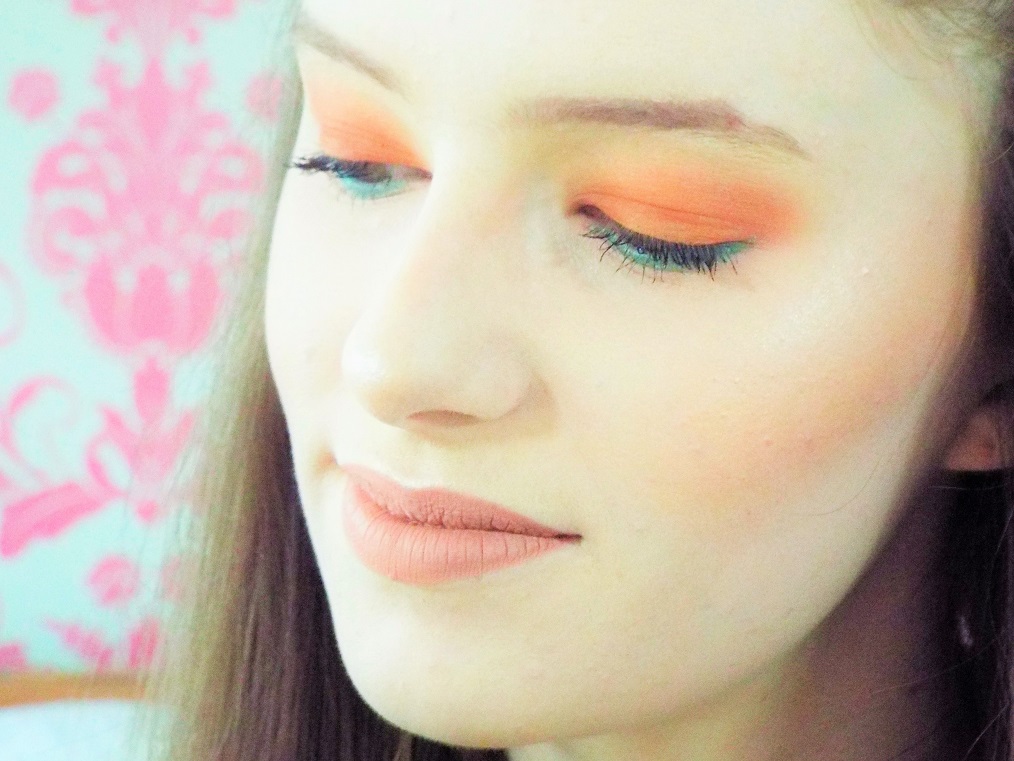
- Preparing the base for this look I primed my eyes with the NYX Proof It Eye Shadow Primer, paired with the same Rimmel Lasting Finish Concealer on top and set with my Collection Pressed Powder in Ivory and my Kiko Eyes 200 fluffy brush.
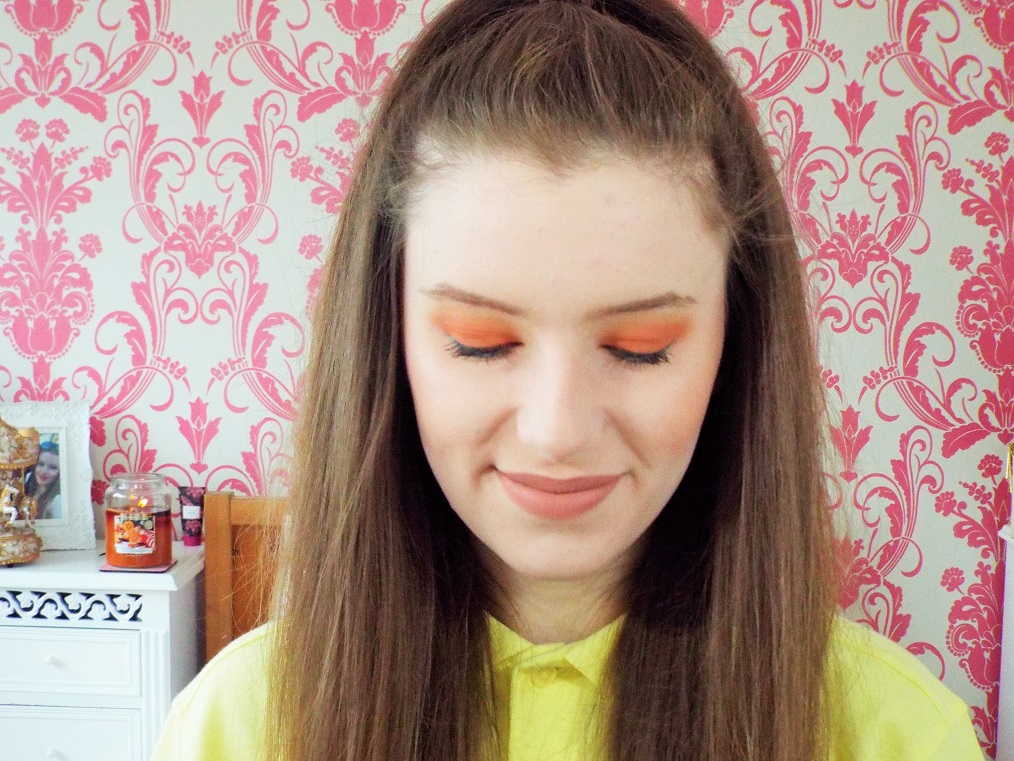
- For my transition shade I took the shade Pearl, a pale peachy shade, from the Makeup Revolution Flawless Mattes Palette on my previously used Kiko fluffy brush and blended this loosely into and above my crease.
- I then took the shade Muse, a slightly brown, brick toned peach shade, form the same Makeup Revolution palette on my Zoeva 227 Luxe Soft Definer brush and blended this into my crease and outer V.
- I repeated this step three times just to build up the opacity and intensity of the colour in my crease.
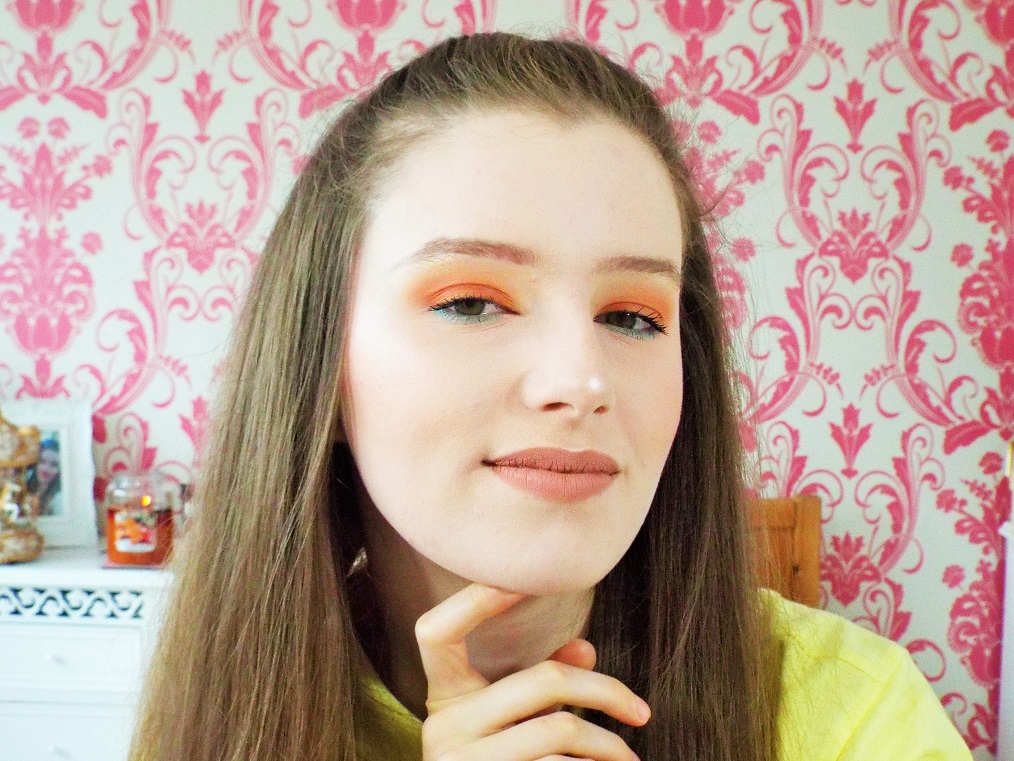
- I then applied the shade Rust, a warm yet light orange-y shade, from the same Makeup Revolution palette to my entire lid, using my Zoeva 232 Luxe Classic Shader brush.
- Now the look is almost complete but to finalise it I went back in with a light dabble of the shade Muse and carefully blended this deep into my crease, to diffuse the crease and lid shades together and add some extra definition to the crease as the shades were quite similar in tone.
- Lastly on the eyes at this point I simply curled my lashes and added two layers of the Rimmel Super Curler Mascara in the shade black.
Base
- As usual I spritzed my face with some MAC Fix +, wafted till dry and smoothed and patted in my Nivea Men Sensitive Post Shave Balm as my primer.
- I then applied a little dabble of the Collection Lasting Perfection Concealer in Green to my lovely spots and blended this in using stippling motions and my Zoeva 142 Concealer Buffer brush.
- For foundation I went with the Rimmel Stay Matte Foundation in the shade Light Porcelain because I wanted to stick with the matte theme of the look.
- I applied two thin layers of this with my damp Beauty Blender.
- For under eyes I used my foundation as a concealer as I have ran out of my usual trusted choice and I also blended this out with the pointed end of my Beauty Blender.
- Baking my under eye area in place I pressed my Bourjois Java Rice Powder in using my beauty blender.
- Before setting my entire face I added a generous dabble of the Benefit Watt's Up Highlight to my cheekbones, cupids bow, tip of my nose and brown bone for a subtle warm glow. To apply this I used my fingers and the warmth of them helped to blend the product into my skin.
- I then went in with my No7 powder puff and the same Collection Pressed Powder I used to set my eye shadow base with and set my entire face and gently dusted away my under eye bake with a fluffy brush.
Cheeks
- Bringing some colour and definition back into my complexion I contoured the hollows of my cheeks with my Sleek contour from the Face Form Palette in the shade Fair.
- Adding a little more dazzle to this mostly matte look I then went over my already applied cream highlighter with my trusted Sleek highlight, again from the Face Form Palette in Fair.
- Now for that pumpkin glow! My blusher of choice was Coralista Boxed Blush from Benefit, which I applied to the apples of my cheeks and up towards my ears using the Zoeva 127 Luxe Sheer Cheek Brush.
Lower Lash Line
- By now you may be thinking "hmmm, orange-y but not so pumpkin-y" well alas my friends, this is the part where things get all things pumpkin'y!
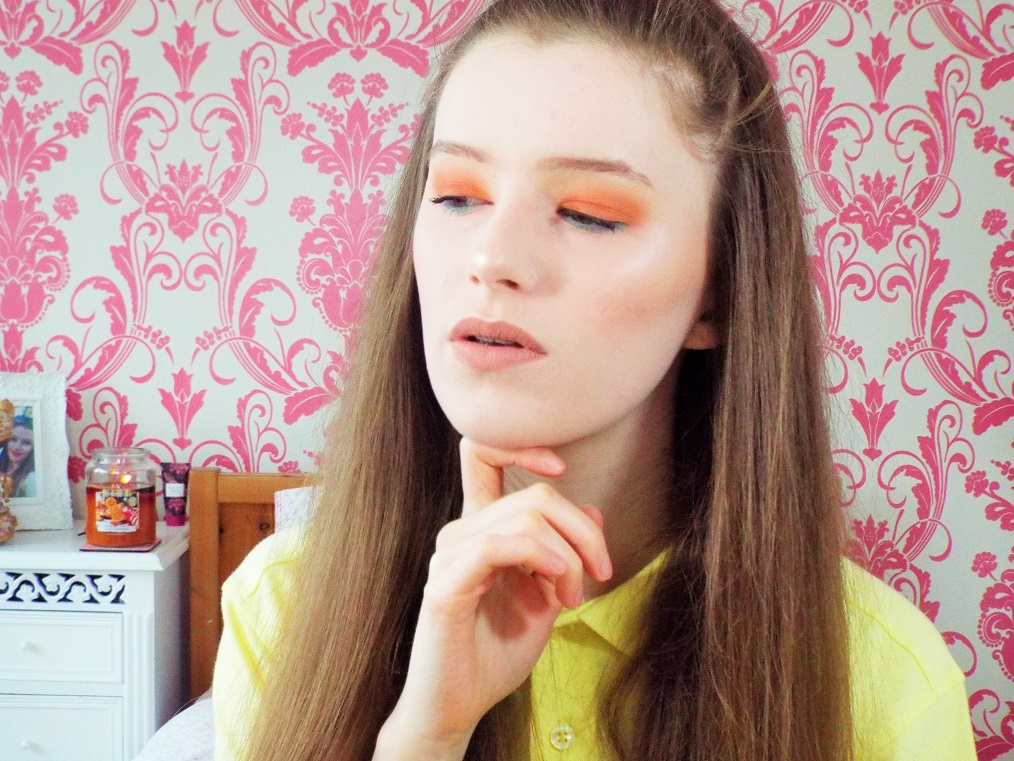
- Acting as the green of a pumpkin stalk, I took my sparkly GOSH Effect Powder pigment in the shade Azure under my eyes.
- I blended this in with my Zoeva 230 Luxe Pencil brush and applied a couple of layers to really intensify the colour.
- To finish I then applied my Rimmel Super Curler Mascara to my lower lashes.
Lips
- For the lips I stuck with the matte theme and really wanted something very muted yet with a hint of peach so I chose the NYX Lip Lingerie in the shade Satin Ribbon and applied two layers of this to my lips to make the colour opaque and even.
With a last spritz of Fix + all over and wafted until dry that completed my pumpkin pie inspired makeup look!
I hope you enjoyed this post as I very much enjoyed letting my inner pumpkin out with this look and also enjoyed how simple it was to piece together! If you decide to let your inner pumpkin out and try the look then please show me as I would love share the excitement of all things Halloween-eey and autumnal with you too!
Ellie x
Ellie this is really cool and I must give this a try myself! Going for a matte orange shade normally would scare me, but it actually looks great. And I also love that you've added the green underneath - it really adds to the whole look, it is so effective, very pumpkin-esque! 🎃 Loved this post and the pictures too!
ReplyDeleteAaaaaaaaa, thanks so much for the comment Charlotte! :D You are ever so kind! <3 I'm made up you like the look, it's something I wouldn't normally go for but I really enjoyed wearing it. The matte shades make it exceptionally wearable too! I think orange and green have now become my signature colours for Autumn this year, haha :) . And thank you so much on the pictures! Do you really think they are alrighty? They aren't my most favourite pictures I have ever taken :'D I had a bit of a struggle photographing this one. I thought my first picture looked a tad odd but then I though "oh well poo it, it looks spooky" haha :'D Xx
Delete